

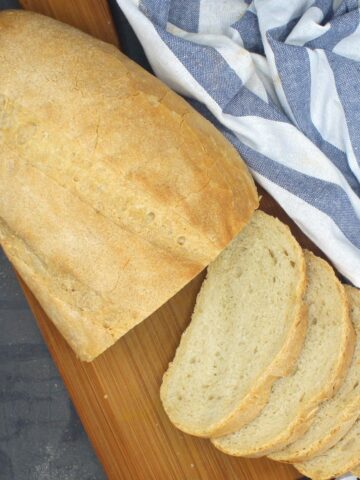
With this easy French bread recipe you can have fresh, homemade bread even on a weeknight. It has a soft, light crumb, a golden, crackly crust, and it's ready in two hours.
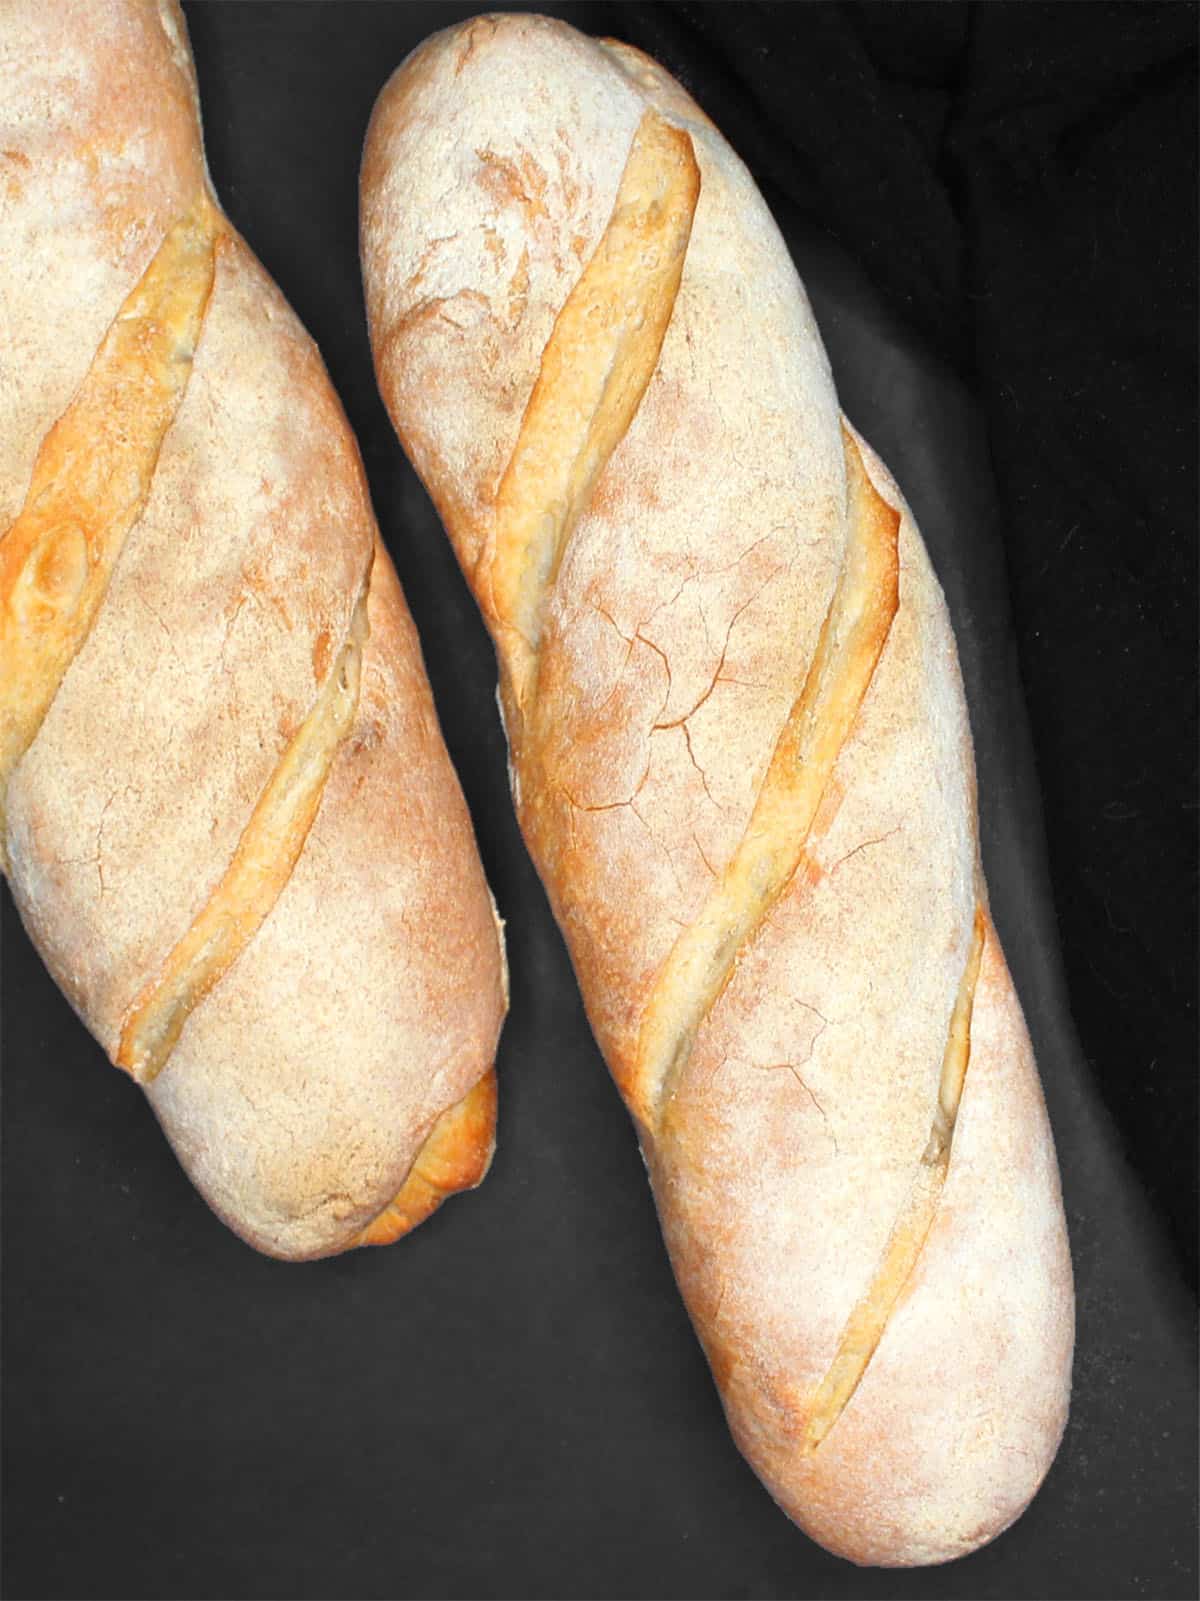
Table of Contents
The best French bread
If you think baking French bread is intimidating, here's the perfect loaf to hone your skills on: it has a golden, crispy crust and a soft, fluffy crumb with a fantastic hole structure. It's so good, it'll make even the most seasoned baker proud. It's so quick, it'll flip even the most impatient among us who think making bread - real bread, real good bread - takes too much time. Best of all, it's so easy, especially with my step-by-step directions and photo guide below.
French bread is a minimalist bread. It needs just four basic ingredients - flour, yeast, salt and water - but what sets it apart is the high water content and the kneading and the folding of the dough to make those long, slender loaves. You will get better with practice but meanwhile, to make this bread foolproof without straying too far from authenticity, we'll add one or two other simple ingredients.
My top tips
- "Bloom" the yeast. Before using yeast that has been sitting around for a while, make sure it's still alive by giving the yeast time to "bloom" in lukewarm water. If it froths and bubbles in five minutes, it's active. If not, you need new yeast.
- Use a smidgen of vitamin C. This is optional and it sounds weird, I know, but it really makes the bread foolproof. I adopted this idea from the food scientist Shirley Corriher who adds a bit of vitamin C to her French bread recipe to help the yeast develop. I use ¼ of a teaspoon of Vitamin C powder, but you can also crush a 500 mg vitamin C tablet and use ¼ of it in this recipe.
- Knead the dough. French bread dough needs to be kneaded thoroughly so the gluten is activated, helping the bread rise beautifully. Once the dough has come together, I recommend kneading it for at least five more minutes, and up to eight minutes for best results. For a no-knead bread recipe, try no-knead sourdough bread or crusty sourdough rolls.
- Make the dough soft but not sticky. The dough for French bread should look a bit tacky after it's been kneaded (see photos below), but it shouldn't stick to your hands and you should easily be able to form it into a ball. Don't be tempted to add too much flour. A French bread needs a dough with a high water content that's soft, supple and can be easily shaped.
- Slash the risen loaves. Making a couple of gashes in the bread loaves after they've risen and before you bake them gives the gases released by the yeast a vent to escape. The gashes also puff out as the bread bakes, giving the bread an artisanal look. A bread lame (pronounced "lahm") is the best tool for slashing risen loaves but any sharp knife will work. The key is not to saw into the risen loaf but to make a sharp, swift cut, going at least a quarter inch to a half inch deep, with a single stroke. You will get better at this with practice.
- Dust the loaves with flour after shaping them. You need to cover the unbaked loaves as they rise. Dusting them with flour will keep the kitchen towel from sticking to the loaves and potentially deflating them.
- Put a pan of water in the oven when you preheat it. This helps create a steamy sauna in the oven. When the bread bakes in the moist heat, it acquires that perfect, crisp crust.
Just made this for lunch and it was fabulous. Was a bit worried it was all too easy but it was and turned out perfectly.
- Louise
Recipe card
Easy French Bread
Ingredients
- 2¼ teaspoon active dry yeast (1 packet)
- 1 teaspoon sugar (feeds yeast to make it work faster)
- 1¾ cups water (lukewarm)
- 3½ cups bread flour (you might not need all of this)
- 1 teaspoons salt
Optional ingredient
- ¼ teaspoon vitamin C powder (or ½ of a 500 mg vitamin C tablet, crushed)
Instructions
Make the dough
- Place the yeast in a large bowl or the bowl of a stand mixer along with the sugar. Add water and give it a quick stir. The yeast should froth and bubble in five minutes.
- Add 2 cups of flour.
- Mix in the stand mixer with the dough hook attachment, or with a ladle, until a shaggy dough forms.
- Add 1 more cup of flour, salt and vitamin C if using. Mix and, if needed, add more flour, a tablespoon at a time, until a slightly tacky looking but smooth dough forms. I needed just under ½ cup more of flour. Continue kneading for 5-8 minutes on medium low speed.
First rise
- Turn out the dough on a work surface and knead it lightly before shaping it into a smooth ball. Place the ball in an oiled bowl, turning it over once to coat the top with oil. Cover tightly with a lid or cling wrap and set the bowl aside for 45 minutes in a warm spot in your kitchen.
- After 45 minutes the dough will have doubled, or more. Turn it out onto the work surface, knead it lightly to deflate it, then cut the dough into two.
Forming the loaves and second rise
- Dust a baking sheet large enough to hold two loaves comfortably with flour.
- Turn the dough out onto your work surface. Divide it into two pieces.
- Form each half of the dough into a ball.
- Punch out the dough into a disc about eight inches in diameter. You can also use a rolling pin. Flip the dough over so the smooth side is at the bottom.
- Begin folding the dough by rolling it, then pinching in the seams with your fingers or with the heel of your hand. Continue rolling, pinching in the seam each time.
- Pinch in the final seam as best as you can. This will ensure that the loaf doesn't open up as it rises.
- Flip the loaf over so the seam side is down. Using the palms of your hand, roll each cylinder on the work surface until you have a 12-inch loaf with slightly tapered edges. Repeat with the second ball of dough.
- Place the two loaves side by side, with at least 4-5 inches between them, on the baking sheet. Dust flour generously over the tops of the loaves. I find this easiest to do using a simple mesh strainer. Cover the loaves with a kitchen towel and set them aside to rise for 45 minutes until they are very puffy and have doubled in size.
Bake the French bread
- About 15 minutes before the loaves are done rising, preheat the oven to 400 degrees Fahrenheit/204 degrees Celsius. Place a baking pan filled with water on the lowest rack of the oven.
- Use a knife or a bread lame or a very sharp blade to make two or three diagonal gashes on each loaf. Use a single, clean motion - don't saw into the loaf or you will deflate it.
- Place the baking sheet on the middle rack of the oven and bake 35 minutes until the loaves are golden brown.
- Transfer the loaves to a cooling rack and let them cool completely before slicing.
Nutrition Information
To print recipe card without images, uncheck "instruction images" after clicking the "print recipe" button.

Step by step photo guide
The step by step guide with pictures below shows you exactly what the bread should look like at every stage, and how to shape and fold it. I've broken down the process further into four simple steps to make it easy to follow along.
Make the dough

Place yeast in a large bowl or bowl of stand mixer with the sugar and lukewarm water. Mix with a spoon and set aside for five minutes until the yeast froths or "blooms".

Add two cups of bread flour and mix using the dough hook attachment of a stand mixer or with a ladle if doing this by hand.

You should get a shaggy dough that should look like this.

Add another 1 cups flour and mix until a dough forms. Add a tablespoon more of flour at a time until the dough no longer looks very wet but is still very soft and slightly tacky. Continue kneading for 5-8 minutes, by hand or with the stand mixer set to a medium-low speed.
First rise

After kneading, the dough should still look slightly tacky. It will be soft and pliable but it shouldn't stick to the bowl or to your hands.

Form the dough into a smooth ball and place it in an oiled bowl, turning the dough over once to coat the top with oil. Cover with a tight lid or cling wrap and set aside in a warm spot in your kitchen for the dough to rise.

After 45 minutes the dough should have doubled.

Turn the dough out onto your work surface. Divide it into two pieces.
Fold and shape loaves

Form each of the halves into a smooth ball. Set one aside, covered, while you work with the other.

Punch out the dough into a disc about eight inches in diameter. You can also use a rolling pin. Flip the dough over so the smooth side is at the bottom.

Begin folding the dough by rolling it, then pinching in the seams with your fingers or with the heel of your hand. Continue rolling, pinching in the seam each time.

Pinch in the final seam as best as you can. This will ensure that the loaf doesn't open up as it rises.
Second and final rise/bake bread

Flip the loaf over so the seam side is down. Use your hands to roll out the dough into a longer, baguette-like shape with tapered edges. You can do this by emulating a rolling pin, only the loaf is the rolling pin in this case. The finished loaf should be about 12 inches long.

Form the second piece of dough into a loaf and place the two loaves side by side on a floured baking sheet. Don't seek perfection - I never get the shape just right, but the bread always tastes great. Dust the loaves with flour and cover them loosely with a kitchen towel. Set the loaves aside in a warm spot for 45 more minutes. In the last 15 minutes, turn on the oven to 400 degrees Fahrenheit/205 degrees Celsius. Place a baking pan filled with water in the oven.

At the end of 45 minutes the loaves will be very puffy. Use a sharp knife or a bread lame to cut two or three gashes at equal intervals. Use a single motion for each gash to avoid deflating the risen bread.

Place the baking sheet in the oven and bake the loaves for 35 minutes or until golden-brown. Remove the baking sheet from the oven, transfer loaves to a cooling rack, and let the bread cool thoroughly before slicing and serving.

French bread FAQs
Follow the recipe for whole-wheat French bread.
Absolutely! Here's my recipe for sourdough French bread.
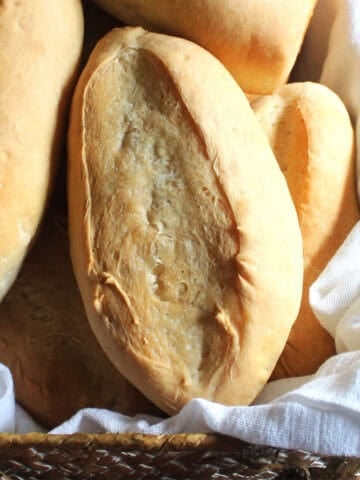
A baguette is a French bread but the term "French bread" itself can cover a wide range of French type breads, including baguettes, which are very long and thin with very crackly crusts and a soft crumb with air pockets; and batards, which are shorter and fatter but have a texture similar to baguettes. What you find under the "French bread" label in supermarket shelves here in the United States is shaped like a batard, but with a softer crust and a more dense crumb.
My bread recipe produces loaves that have the crispy crust and air pockets of a classic baguette, but are shorter. In France a baguette has to be skinnier and upwards of 26 inches long to qualify for the name - a size too big for home ovens.
You can knead by hand for the exact same time as you would knead it in the hand mixer: five to eight minutes. Five minutes is fine, but eight is even better.
Absolutely. It makes the best toast, and is perfect with just a pat of vegan butter or anything more you want to pile on it, including peanut butter and jelly or avocado.
The bread is freshest on the day you bake it, but you can easily store it in the fridge or freezer for a longer period. Store in an airtight bag in the fridge for up to a week, and in a freezer-safe bag in the freezer for up to three months. Before using, thaw if frozen. Spray the loaf with water and reheat in a 350-degree Fahrenheit/180-degree Celsius oven until warmed through and soft again.
Crusty bread and soup -- or stew -- are a match made in heaven. I love serving this crusty French bread with a delicious vegan lamb stew, vegan cassoulet or vegan beef stew.
You can also make avocado toast or pile the bread high with this chickpea and avocado salad for breakfast.
To make French bread pizza cut the bread lengthwise down the middle, place it on a baking sheet, top with marinara and vegan cheese and anything else you'd put on your pizza and bake in a 400 degree F oven for about 15 minutes.
You can also use this bread to make vegan French toast or bruschetta-like appetizers. Cut the bread into slices, grill, then top each slice with vegan basil pesto, tomatoes, and vegan cashew parmesan.
First published July 27, 2009. Updated and re-published on Jan. 25, 2025.


Anna Lopez says
Great recipe! I have made it twice, and it yields 2 nice-sized loaves that have a great texture inside and out. Such a simple recipe. Thank you!
Vaishali Honawar says
So happy you loved it!
NALINI PATEL says
Vaishaliben,
Unbelievable, very easy and faster recipe I was very happy it turned out excellent bread. Thank you
Vaishali says
Yay, so happy you made it!
Susan says
This is a wonderful base bread recipe alobe or with numerous varied additions and can be made into different shapes. Deffo a keeper, thanks!
Vaishali says
Awesome! So happy you made it.
Spud says
Thanks Vaishali, fantastic and really simple to follow recipe, have been daunted by other french bread recipes. Came out brilliantly, always love your recipes.
Vaishali says
So happy to hear! ❤️
Michelle says
Crust was wayyy too overcooked and hard but that was my fault because I was so hung up with the color. I kept adding minutes. Must have added 10 minutes to the 29 minute bake time. So good though so I'll try again tomorrow. Going to reduce salt to only 1 teaspoon per my liking. Thank you and I'll update on how it goes tomorrow
Vaishali says
Glad you liked it! Adding too much time to baking will make the bread dryer.
Vaishali says
You let the second rise go too long.
Mandi says
Delicious. It is so hard to wait for it to cool before slicing!
Vaishali says
Awesome!
Louise says
Just made this for lunch and it was fabulous. Was a bit worried it was all too easy but it was and turned out perfectly. Thank you. Will definitely be making this again.
Vaishali says
That's great to hear, Louise. 🙂 It definitely is an easy recipe. So happy you enjoyed it.
Marion says
How to store once baked so it is crispy for tomorrow?
Kavita Shroff says
Hi Vaishali from India
Tried your recipe and it’s amazing. I’ve been baking breads for a long time and with the Internet flooded with recipes I keep trying different ones. Yours is one of the BEST!
Thank you for sharing
Vaishali says
Hi Kavita, so happy to hear you liked it! Thanks for letting me know. 🙂
James says
hello, can i use bread flour? will it change the results
Vaishali says
It may result in a harder crust but should be okay otherwise.
Helen says
I have made your this many times, it is great. Can I put it in the fridge for a cool rise?
Vaishali says
Yes, overnight should be good.
Cole says
You only make the passing instruction to spray the walls of the oven, after a quick google search I find so many thoughts and theories on what works and what doesn’t. Some have a cast iron skillet with rocks in their oven... sounds like a sauna. Vaishali, might you elaborate on your oven spraying method?
Vaishali says
All I do is spray some water on the walls of the oven with a sprayer bottle and this helps create a crustier bread. You can also place a pan of hot water in the oven. A sauna? Sounds interesting but too much work for me. 🙂
Anonymous says
Am I suppossed to turn bread down to 400 degrees or leave at 450? Thank you
Vaishali Honawar says
It's 400 degrees Fahrenheit. Preheat to 400 and bake! Sorry about any confusion.
sharon says
I make this recipe all the time. Can i make the recipe without baking it and freeze unbaked dough...
Vaishali says
Yes!
Thomas says
I love how easy this recipe is and it yields wonderful results! Thank you ☮️????????
Vaishali says
So happy to hear, Thomas!
Bobbi says
I made your sourdough starter recipe thinking there’d be many recipes using your starter. The french bread, sandwich, ciabatta all use active yeast and not your starter. Are there any more recipes using your sourdough starter?
Can some discard be used to make starter for another person?
Vaishali says
And yes, the discard can be used to start another batch of starter.
shapelessjourneys says
Mixed the dough in a food processor, and only put it in the oven for 20 minutes as per another commentor! I also used a pan with water instead of spraying. DELICIOUS!
Vaishali says
Awesome, so happy to hear!
James says
We are super happy with this recipe. Fluffy bread with a nice crisp exterior. We made a few slight alterations: 1) we used molasses instead of sugar, 2) used a pan with water instead of spraying the oven, and 3) only baked for 21 minutes. This is going to be our "everyday" bread recipe for a while!
Marianne says
I never made bread before. It was not easy as super sticky and loose. I thought I messed up and could not make the logs. Put in as a round mound of mess but oh my...this was gorgeous and incredibly delicious. Thank you for an incredible recipe. It was terrific as a large round bread.
Lindsey says
This was absolutely incredible!!! My whole family loved it and it is just PERFECT! it tastes like a bakery, just amazing!
Ela says
this came out AMAZING!! I had to add a lot of flour though so I was kinda scared till it came out of the oven, the dough was very sticky. but it is so so good! also, it tastes kinda bland to my tastes, do you think adding more salt will be alright? or will it do something to the yeast?
Vaishali says
You can add more salt to your taste, it wouldn't hurt. Happy you tried the recipe!
Nargess says
Hi,
It sounds great. I would like to make it very soon but I like to know if all 4 cups of the flour should be used or 3c1/2 ?
unbleached all purpose flour (you might not need all of this). Thanks.
Vaishali says
Add more flour only if the dough is too soft.
MICHELLE says
I've tried this recipe a couple of times already and its been great. Book marking it as my go to! HELLO FROM NY!
Nicole says
Super easy recipe! Perfect to pair with some vegan meatballs and pasta:)
Page Barger says
Turned out absolutely incredible!! Me and my family wiped out the first loaf in minutes! I plan to use the other loaf throughout the week! I will definitely make this again!! I do have a few questions
My crust was very hard but didn't develop much color. any tips?
Would this recipe work in loaf pans?
Do you have a recommendation for a good proofing temperature?
Can you make dough in advance and refrigerate it and then bake the next day?
Thank you so much!!
Pym says
No tiles, no pizza stone no teeth isvthis bread soft?
Also no oven using countertop convection oven so can't put bowl of water in it.
Claire says
I've made this bread multiple times and it always comes out great! I don't have a baking stone or ceramic tile to use. I just make sure the oven is piping hot.
I've used the same recipe to make two small loaves of sandwich bread with great success.
Sandra says
Thank you so much for sharing this:-) We are going to make it over the weekend.. My 15 year old son and I have been vegan for a month now.. You are helping to make our lives better.. Hugs From Sandra in Homer, Mi
Cathy says
Thank you for this awesome recipe!! I made it today and I absolutely love it!!! Can't wait to try your roll recipe...that's next!!!
Jamie says
Have you tried this recipe with gluten free flour?